If your Eureka NEN110 won’t turn on, don’t panic—most startup issues stem from a full dust cup, clogged filter, or the thermal cutoff safety feature kicking in. This guide walks you through the exact troubleshooting steps and maintenance procedures from the official manual to get your vacuum running again.

Why Your Eureka NEN110 Won’t Turn On
Understanding the thermal cutoff protection system
The Eureka NEN110 is equipped with a special thermostat that automatically shuts off the motor when it overheats. This is a safety feature, not a defect. The thermal cutoff protects your vacuum’s motor from damage caused by restricted airflow, which builds internal heat. If your vacuum suddenly stops working mid-use or won’t start at all, the thermal cutoff has likely activated—and there’s always an underlying cause you need to fix.
Common reasons for startup failure
According to the problem-solving section of the NEN110 manual, the most common reasons your vacuum won’t turn on are:
- A full dust cup — The single most frequent cause. Dust buildup blocks airflow and triggers the thermal cutoff.
- A clogged or blocked filter — Restricts air circulation and causes motor overheating.
- A blocked hose — Debris lodged inside prevents suction and triggers the safety shutdown.
- Poor electrical connection — The outlet isn’t working or the plug isn’t fully seated.
- The power button wasn’t pressed — Sounds obvious, but it happens more than you’d think.
When to call customer service vs. DIY fixes
Try the troubleshooting steps in this guide first. They address 95% of startup issues without requiring service calls. However, contact Eureka Customer Service at 1-800-282-2886 if: the vacuum still won’t start after you’ve emptied the dust cup, cleaned the filter, cleared blockages, and waited 30 minutes; you suspect electrical damage (burned smell, visible damage to the cord); or the thermal cutoff activates repeatedly even after maintenance. Your NEN110 includes a one-year limited warranty from the date of original purchase when used according to the manual.
Step 1: Check the Power Connection
Verifying the electrical outlet is working
Before assuming your vacuum is broken, confirm the outlet itself is functional. Plug in a different appliance—a lamp, phone charger, or coffee maker—into the same outlet. If that device works, the outlet is fine. If it doesn’t, try plugging the vacuum into a different outlet in another room. Some outlets are controlled by wall switches or may have tripped circuit breakers.
Check the outlet’s breaker panel if you’re using an outlet on an exterior wall or in a kitchen or bathroom. Reset any tripped breaker and try again. Never use extension cords or outlets with inadequate current capacity—the NEN110 requires a dedicated, properly grounded outlet.
Ensuring the cord is fully extended and secure
The NEN110’s power cord retracts into the machine. Pull the cord out completely until you see the yellow mark on the cord—do not pull past this point, or you risk damaging the cord. The red mark indicates you’ve pulled too far. Once the cord is fully extended, insert the plug firmly into the outlet. You should hear or feel a click as it seats fully.
Inspect the entire length of the cord for cuts, cracks, or exposed wires. Do not use a vacuum with a damaged cord—call customer service instead. The important safeguards section explicitly states: “Do not use with damaged cord or plug.”
Testing different outlets to isolate the problem
If the vacuum doesn’t start with the first outlet, test at least two other outlets in different areas of your home. Use outlets that aren’t controlled by dimmer switches or wall controls. If the vacuum works with one outlet but not another, the problem is the outlet, not the vacuum. Have that outlet checked by an electrician.
Step 2: Empty the Dust Cup (Most Common Fix)
Why a full dust cup prevents startup
A full dust cup is the #1 reason the NEN110 won’t turn on. As dust accumulates, it blocks airflow through the machine. Restricted airflow causes the motor to work harder, generating excessive heat. Once internal temperature rises beyond the thermostat’s threshold, the thermal cutoff automatically shuts off power—even if you’re just trying to start the vacuum. The motor may not even have a chance to spin.
The manual explicitly states: “A full dust cup will reduce the efficiency of the vacuum cleaner so be sure to empty the dust cup regularly.” Additionally, “Empty the dust cup after each use. Also be sure to empty the dust cup anytime dust reaches the max fill line.”
How to safely remove and empty the dust cup
Always switch off the vacuum and unplug it from the electrical socket before touching the dust cup. Then follow these steps:
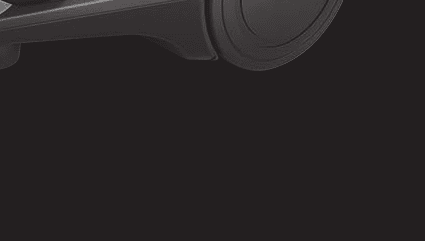
- Locate the dust cup release button on the front of the machine (see the parts identification diagram).
- Press the dust cup release button firmly. The dust cup will disengage from the main unit.
- Remove the dust cup by pulling it straight away from the vacuum body.
- Carry the dust cup over a trash receptacle.
- Press the release button on the bottom of the dust cup to open the lower lid. Dust will fall out into the trash.
- Close the dust cup lid after all dust has emptied completely.
- Return the dust cup to the vacuum cleaner and push until you hear or feel a click, indicating it’s fully seated.
Checking the max fill line indicator
Before reinserting the dust cup, look at the transparent section of the cup. Most dust cups have a max fill line marked on the side. If dust has accumulated above this line, airflow is already severely restricted. Make it a habit to empty the cup when it reaches the line, not when it’s overflowing. For households with pets or heavy foot traffic, you may need to empty the dust cup more than once per day.
Step 3: Inspect and Clean the Filter

Why a blocked filter triggers the thermal cutoff
The NEN110 uses a sponge filter that requires regular cleaning. As the filter collects dust, it becomes increasingly clogged. A clogged filter blocks airflow just as much as a full dust cup does. The motor works harder to pull air through the clogged filter, temperatures rise inside the housing, and the thermal cutoff activates. The manual states: “Sponge filters require cleaning on a monthly basis (or more depending on use frequency).”
The problem-solving section lists “Filter is blocked” as a reason the vacuum won’t turn on. If you haven’t cleaned the filter in over a month, it’s almost certainly the culprit.
How to safely remove the sponge filter
Again, switch off the vacuum and unplug it before removing the filter.
- Remove the dust cup (see Step 2 above).
- Pull on the dust cup lid clip and lift the cover upward. The cover is the top section of the dust cup assembly.
- Locate the filter inside the dust cup lid. You’ll see a handle or pull tab on the filter housing.
- Pull on the handle of the filter housing to disengage it. The entire filter assembly will slide out.
- Tap the filter housing over a trash bin several times to dislodge loose dust. This removes the bulk of accumulated particles.
- Remove the sponge filter from its housing by sliding it out or unclipping it, depending on your model variant.
Proper rinsing and drying procedures (24-hour drying time)
This step is critical. The manual specifies exact cleaning procedures:
Wash the filter under running water at a maximum temperature of 40°C (approximately 104°F). Use cool to lukewarm water—hot water can damage the sponge material. Gently rub the filter material under the water stream to remove embedded dust. Do not use detergents, soap, or chemical cleaners of any kind. The manual explicitly states: “DO NOT USE DETERGENTS to clean any part.”
After rinsing, leave the filter out to dry for 24 hours or until fully dry before placing it back in the vacuum. This drying period is non-negotiable. Reinstalling a damp filter will cause the motor to overheat immediately because wet material blocks airflow more effectively than dry dust ever could. If you’re in a humid climate or the filter is still damp after 24 hours, wait longer.
Once the filter is completely dry:
- Place the filter back into its housing.
- Put the filter housing back into the dust cup lid.
- Close the dust cup lid.
- Reattach the dust cup to the vacuum and push until it clicks into place.
Step 4: Clear Hose and Suction Blockages
Locating common clogs in the hose
A blocked hose is the third leading cause of startup failure. Debris can lodge anywhere along the hose length, but the most common clog locations are: near the connection points (where the hose attaches to the vacuum or wand); at bends in the hose (particles accumulate in tight curves); and in the first 12-18 inches of the hose nearest the floor brush.
To check the hose, unplug the vacuum and detach the hose by twisting it counterclockwise at the air inlet. Hold the hose up to a light source and look through it. You should be able to see daylight through the entire length. If you see blockages, shine a flashlight into both ends and identify the location of the clog.
Removing debris from the air inlet
The air inlet is the opening on the front of the vacuum where the hose connects. After you’ve removed the hose, look into the air inlet opening. Hair, pet fur, and lint often wrap around the inlet edges or partially lodge inside. Use a straightened wire coat hanger or a plumbing snake to carefully pull out any visible debris. Be gentle—you don’t want to damage the internal components.
If you see a blockage deep inside the inlet, try flushing it with water (with the vacuum unplugged, of course). Pour water through the inlet while using your straightened wire to dislodge the clog. You’ll hear a splash as debris breaks free. Let the vacuum air dry completely—at least 2-3 hours—before plugging it back in.
Checking the floor brush suction inlet
The floor brush (or floor nozzle, as the manual calls it) has its own suction inlet. Flip the vacuum over or turn the brush upside down to inspect the underside. Look for hair wrapped around the bristles or lodged in the suction inlet opening. Use scissors to cut away any hair and pull out embedded debris.
The problem-solving table lists “Suction inlet of brush or accessories is blocked” as a reason the vacuum stops working. Clear this inlet completely and reconnect the hose and accessories.
The 30-Minute Thermal Cutoff Reset
Why the vacuum shuts off automatically
The thermal cutoff is an automatic safety feature, not a fault. The thermostat inside the motor housing activates when it detects dangerous temperature levels. The manual explains: “This vacuum cleaner has a special thermostat that protects the cleaner in case of motor overheating. If the cleaner suddenly shuts off,” it’s because one or more of the airflow restrictions we’ve covered has caused the motor to overheat.
Common scenarios: you’re vacuuming with a full dust cup, unaware it’s restricting airflow. The motor temperature rises steadily. Suddenly, the vacuum cuts off mid-stroke. Or you try to start the vacuum but the thermal cutoff has already activated from the previous use, so the machine won’t power on at all.
How long to wait before attempting restart
The manual specifies: “wait at least 30 minutes before attempting to use the cleaner.” This 30-minute minimum allows the motor to cool down to safe operating temperature. Some situations require longer waiting periods. The manual adds: “if you have cleaned the incorrect space, please wait 24 hours for the filters to fully dry before putting them back into the machine.”
If you’ve recently cleaned and reinstalled a damp filter, wait the full 24 hours. If the dust cup was full and you’ve now emptied it, 30 minutes is sufficient. If you’re unsure, waiting longer does no harm.
Step-by-step reset procedure
Follow this exact sequence to safely restart your NEN110 after the thermal cutoff activates:
- Push the power switch to OFF (0). The switch is located on the top or side of the main unit.
- Unplug the vacuum from the electrical outlet. Grasp the plug itself, not the cord.
- Identify the source of overheating. Check for: a full dust cup (empty it), a blocked hose (clear it), a clogged filter (clean it), or a blocked brush suction inlet (clear it).
- Fix the problem. Empty, clean, or clear as needed.
- Wait at least 30 minutes. Longer if the filter was wet or if cleaning took a long time.
- Plug the vacuum back into the electrical outlet. Ensure the outlet is working and the plug is fully seated.
- Push the power switch ON (I).
- Listen for the motor to start. You should hear the motor spin and feel suction at the hose opening.
If the motor starts but the thermal cutoff activates again within minutes, you haven’t fully addressed the airflow restriction. Unplug immediately, unplug again, and repeat steps 3-7. Check more carefully for blockages—sometimes clogs are located in unexpected places, like inside the hose connection coupling.
When to Contact Eureka Customer Support

Warranty coverage for electrical failures
The Eureka one-year limited warranty covers defects in material and workmanship for one year from the date of original purchase. The warranty applies only to the original purchaser and members of the immediate household, and only for purchases from authorized Eureka resellers.
The warranty covers electrical failures, motor defects, and internal components. It does not cover: normal wear and tear, disposable parts like filters and belts, damage from improper use, failure to follow maintenance instructions (such as leaving the filter damp), or damage from external causes like power surges or extreme weather.
If your vacuum still won’t start after completing all the troubleshooting steps in this guide, the problem is likely a defective switch, motor, or internal electrical component—all covered under warranty.
How to reach the Eureka helpline
Contact Eureka Customer Service at:
- Phone (toll-free): 1-800-282-2886
- Email: eureka@speedymail.com
- Website: www.eureka.com
The service team is available to discuss warranty claims and guide you through next steps. Have your model number, type, and serial number ready. These are located on the bottom of your vacuum cleaner. You can also register your product at www.eureka.com by clicking the ‘Register Your Product’ link in the top right corner.
Information needed for warranty claims
When you contact customer service, have the following information ready:
- Model and type number (on the bottom of the vacuum)
- Serial number (also on the bottom)
- Proof of purchase (receipt or order confirmation)
- Date of purchase
- Description of the problem (won’t turn on, thermal cutoff activates repeatedly, etc.)
- List of troubleshooting steps you’ve already completed
The warranty requires submission of proof-of-purchase documentation. If your vacuum is still covered and the defect is confirmed, Eureka will repair or replace it. Eureka pays return shipping charges if repairs are covered by the warranty. You pay the initial shipping charges to send the unit for evaluation.
FAQ
Can I use a vacuum with a full dust cup?
No. A full dust cup restricts airflow, reduces suction power, triggers the thermal cutoff, and can damage the motor. The manual states: “A full dust cup will reduce the efficiency of the vacuum cleaner.” Always empty the dust cup after each use and whenever dust reaches the max fill line. This is the most important maintenance task for keeping your NEN110 running.
How often should I clean the filter?
The manual specifies that sponge filters require cleaning on a monthly basis or more depending on use frequency. If you have pets or a larger household, clean it every 2-3 weeks. Always let the filter dry for 24 hours before reinstalling it. Never operate the vacuum without the sponge filter in place.
Why does my vacuum keep shutting off even after I empty the dust cup?
If the thermal cutoff activates repeatedly, you likely have a secondary airflow restriction. After emptying the dust cup, also clean the filter and check the hose for blockages. Even a partially clogged filter can trigger the thermal cutoff. Make sure you’ve let the filter dry completely (24 hours) after cleaning. If you’re still experiencing issues after addressing all three potential problems, contact Eureka Customer Service.
Can I wash the sponge filter with soap or detergent?
Absolutely not. The manual explicitly states: “DO NOT USE DETERGENTS to clean any part.” Wash the filter only with clean water at a maximum temperature of 40°C (approximately 104°F). Detergents and soaps leave residue that clogs the filter pores and damages the sponge material, making the problem worse.
What does the yellow mark on the power cord mean?
The yellow mark indicates the correct stopping point when pulling the cord out. Do not pull past the yellow mark. The red mark, if visible, means you’ve pulled too far and risk damaging the cord. Pull the cord until you see yellow, then stop.